Nothing in cart


Shipped very fast
1st order by Ben from NSW
This is part of our self-build caravan series. This section covers the internal furniture and fit-out work: cupboards, wing walls, tables, beds, seating and the shower cubicle.
The original examples are kept here because they show practical construction details that are hard to explain without photos. Use them as build principles rather than a fixed layout: keep weight down, use enough fixing points, and think about how each cabinet or wall will support the caravan body.
For the full series, start with Ever Wanted To Build or Rebuild a Caravan?.
Every piece of furniture is different, so the aim of this article is to teach you the fundamentals of building modular furniture, and combining as many of the procedures and different situations that I have encountered.
First, let me say that many videos and photos on the internet may describe specific products, or more automated procedures, or heavier materials, or even inappropriate materials. Since Caravan Plus does not sell many of the products shown in this article, you should trust that it is unbiased. My aim is to show you the strongest and lightest, RV furniture construction that a home builder can achieve and still look 100% professional. There will be home builders who have access to, or experience with using other materials who decide not to follow this guide. Just keep in mind that every extra 10kg of weight in your caravan or campervan will travel with that RV for the next 20 or 30 years.
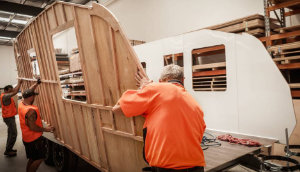
All larger manufacturers build the furniture in a separate area, then add it to the caravan production line either before the walls, or definitely before the roof. This is for efficiency and so you don't have 20 people working at the same place at the same time.
As a home builder, you will probably make one piece at a time, partly on your work bench and partly while installing it. This is why your caravan will be stronger than most mass produced caravans. And you'll enjoy creating it exactly how you want it.
This first photo identifies the first part I will make in this step by step guide. It is the left hand bed side table.

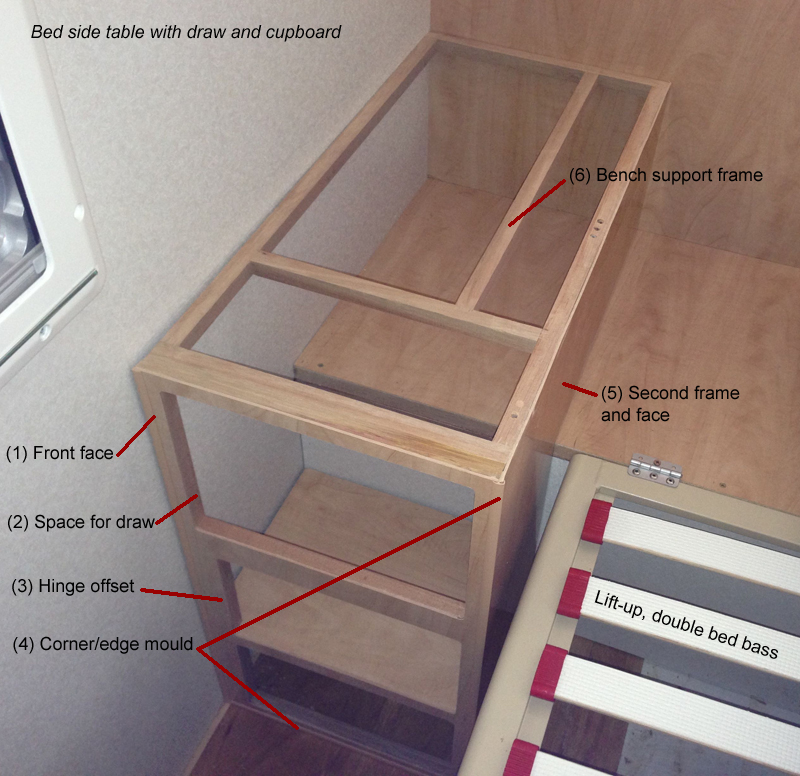
The above photo shows what you would end up with, by following the steps and photos below.
This bedside table straddles over a tunnel boot. It will later have a laminate top. The wardrobe will be built above it.
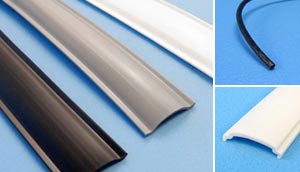
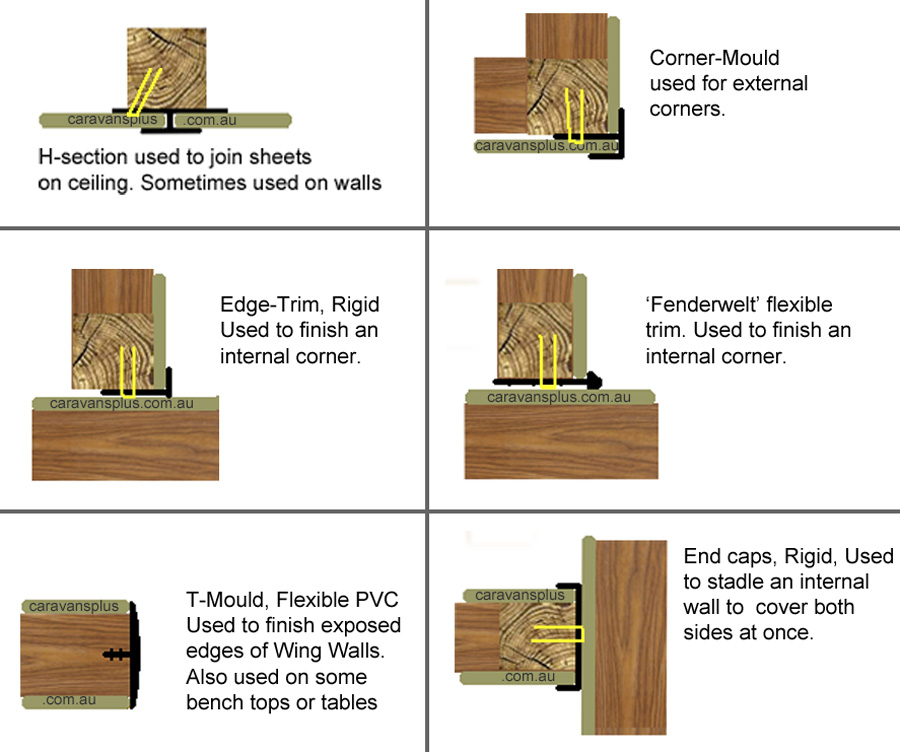
The following diagram shows the most common PVC profiles in BLACK. The YELLOW staples show how these are held in place. The OLIVE is a cross-section of ply, or floor covering. The T-Mould presses into a grove.
For the benefit of those who haven't read 'Building a Caravan wall with timber'. The preferred timber for frames is meranti (sometimes called Pacific maple). It is lightweight, strong and straight grained. It is also readily available in most hardware stores. The preferred sizes are 41mm x 18mm and 18mm x 18mm. If you have a saw bench you can save money by ripping the 41mm into two 18mm lengths.
I did recommend some glue in the joints for wall frames but for furniture it causes a lot of extra unnecessary work. I recommend staples 10-12mm wide, by approx 16mm long for all joints. Two staples for 18mm joins, four for 41mm joins and every 150mm if joining lengths of timber side by side. You should repeat the same on the opposite side.
I don't particularly like using staples, but they are an essential and very effective tool used in caravan construction. The aim is always to hide them by the end. I would challenge any new home builder, to construct a small timber frame with just staples, glue the ply to one face, and attempt to break it. It may flex a little, but that is exactly we want.
For larger frames than shown here, it is best to staple the outside frame, then turn it over to do the other side, before adding all internal timbers. A light sanding with a belt sander before adding the ply is recommended. Your frame still has some 'give' in it at this stage.

I have shown a more complex front face being completed below, as this is the next step for any cupboard. Start on a bench or the floor where your frame is. Apply a line of PVA glue to each piece of timber. Place an oversize piece of ply on top of the timber frame. Place a couple of 4.5mm wide x 16mm long staples along one 'factory cut' side of the ply. If you have a 'factory cut' 90degree corner on the ply - use that to align the frame with the ply. Otherwise ensure your frame is set to 90 degrees with a large set square.
You don't want any staples visible in the front face, so if there won't be plastic trim to cover edge staples, just clamp the sheet until it dries. Please ensure the frame is at 90 degrees.
If your front face requires a sheet join, use a butt join without any moulding, but try and hide it behind doors or draws.
After the glue is dry, use a router with an edge following bearing to remove all excess ply. A slim tungsten bit will do the entire caravan.

The next photo shows how three sections are joined together. As we don't want any screws or staples on the front face, they are attached with screws into the rear of the front face. You would normally have ply on the front face at this time. My excuse is that I was waiting for a ply off-cut. My penalty will be shown later with a cumbersome cupboard to router.

See what happens when you don't follow the procedure. I needed to router the outer edges, and cut-outs in a number of cumbersome positions.

After your ply has been glued to the front face, sand off any burrs. An oscillating multi tool, like the Renovator, is ideal for this.

Next we get to add the corner mould (or corner trim) to the front face. In the photo below the cupboard is sitting on its side to also show the bottom edge.
The corner mould is added to any corner that will have a side sheet added. It has one lip that sits over the front face and the mould gets a couple of staples to hold it to the side of the frame. No glue used here yet. The other lip of the corner mould will Later allow the side sheet to slip into position.
This corner mould stops at the lower edge mould but will go all the way to the top of the frame, in this case. It can be slightly oversized and sanded at the end for a neat appearance.

Now is the time to add the side sheet. Cut the ply slightly oversize with a perfect 90 degree corner between the front face and the floor edge. Place glue on the frame including near the corner mould. Staple into position ensuring the frame lines up with your 90 degree corner. Staples will also go thru the hidden leg of corner mould. Router off the excess ply.
Now that the complete module is constructed, you cover each edge that will contact a wall, floor or ceiling with the rigid style 'Edge Mould', or with the flexible 'Fenderwelt'
With either style of trim, you should continue it around the corners by removing wedges of the unseen 'legs'.

In some cases you may complete the entire module on the work bench, but in this instance I will be adding a long drawer, with the roller guide attached to the caravan wall to save on framing, and valuable space.

Where possible, the furniture is screwed from inside the cabin, through to a wall frame member. Pre-drilling is recommended to prevent splitting in narrow timber. Use cup head screws in most discrete cases, or if essential, counter sunk screws through the side of the front face frame. Don't be miserable with screws if you can foresee stress in an area. Insufficient screws will allow movement and eventually you'll find screws rolling around on the floor. Screws must avoid wires in walls and any plumbing under the floor.
Sometimes it will be necessary to screw from the outside wall frame or from under the floor into the furniture.
This is easy, just make an upside down, floor mounted cupboard.
About the only difference, is the bottom face. You will need to decide if you want a lip on your bottom shelf. I prefer not to and I'll just show the diagram of a cross section. Depending on your styling you can finish the ends of the cupboards with a side ply, or use the 'wing wall' method shown later.

During construction of top cupboards, a corner mould is also placed along the edge between front face and base. A bottom face ply is added next, and at this stage if any wiring is required for lights on the base of the cupboard, do that now. The top face of the cupboard base is added before the cupboard is installed. Also if you want any shelves, they could be added now.
Once the complete ceiling cupboard module is constructed, with embedded wires, add the 'Fenderwelt' to all edges that contact the walls and ceiling. Any fixed or adjustable shelves should be included here. This is then screwed to the walls and ceiling.
A 'Wing Wall' has 'Face Ply' on both sides. It is usually a vertical wall and the flexible 'T-Mould' provides a smooth edge that is ideal for trimming a curved edge.

The exact thickness of the wall will depend on the 'T-Mould' width. Typical sizes are 12mm, 16mm, 18mm or 25mm. The samples above use an 18mm 'T-Mould'. The full height wall (see (1) above ) continues to the ceiling and has a solid core of 12mm ply, covered on both sides with 2.6mm face ply. This was considered a structural 'Bulk head'.
The 'Strip' construction shown below, reduces weight and material, and was used for seat back rests. Internal frame members were positioned where other items will attach later.
After belt sanding the edges, they have a groove that accepts the 'T'mould' centred by the router. Avoid the staples here. The 'T-mould' should firmly press into place, and is on exposed edges only. I suggest this 'T-Mould' goes all the way to floor. Other edges of 'Wing Walls' that attach to the walls, floor or ceilings are treated as modular furniture.

Attaching these walls can be done in a variety of ways. They can be screwed from under the floor, from the outside of the wall frame or through the ceiling frame (this method can limit future modifications). The second method is from inside a cupboard, using the abutting frames. Sometimes it is necessary to add an 18mm x 18mm length to a hidden corner, (see diagram '1' below). It gets screwed to both abutting faces.

There are a number of ways table tops and bench tops are made for caravans. But all have a common feature, they are thinner than they look.
Again I recommend using ply for strength verses weight. If you must use a compressed material, ensure it is water resistant. Commercially available kitchen bench tops look great and maybe OK if you are fitting out a 30foot bus, but they are extraordinarily heavy.


There are a number of options, decide first:
With such a variety of options it is best to view our complete range of table legs.
A popular wall mounted table is shown below. It can be used in two configurations.

Bench tops are made identical to table tops. They may or may not have the extra edge thickness. Place 'Fenderwelt' on edges that join walls or cupboards.
Bench tops should be attached by screwing up through the cupboard frame.
In the first photo in the next section, you will see that the wardrobe actually sits on the bedside cupboard module. The laminated top does not go between the units, it is shaped to go on at the end. A ply template sits on the left cupboard to ensure the shape is perfect.
Bed bases and in-built seating are made in the same way as floor mounted cupboards. They have an outer frame, with face ply. Designs can vary with opening from the top only or drawers and cupboard doors underneath.
It can be very inconvenient to only have top access for seating around tables, while it very useful to lift the entire mattress support under double beds.

A common bed used in Jayco caravans is extendable in length. This is used where space is at a premium and it allows the bed to be shorter during the day (or all the time if suitable) and it extends at night with a bolster cushion folding down at the head of the bed. This base is held up by gas struts. The aluminium base, with slats as shown is available via Jayco spare parts dealers. The wooden base is not included.
The ply covered frame under the bed should be set in about 100mm from the mattress width and length. This allows space for your feet while moving around the bed. The height of the frame is a personal decision but should allow space for your wine bottle(s) to stand up in. (That's my criteria anyway. There are a lot of wineries in Australia)
If a ply mattress support is made by the home builder, it should be made with plenty of ventilation, so the mattress does not sweat. The most common Gas Struts used to hold up a double bed base, with mattress are linked below.
The photos below show the seating adjacent to a table.
I had my cushions professionally covered and they were secured on the backrest with automotive push-in retainers. The base cushions now have velcro (see black strips) to prevent slipping. The cushions need to be made from a firm or high density foam, but again the upholster could assist here if you go that way. Definitely don't use standard foam, it deteriorates in a short time.

Pre-made shower cubicles are very popular and come in a variety of sizes. The trouble I found was that many moulds are owned by companies that fit out motorhomes and campervans and were not available to purchase. Certainly some sizes are available and if a suitable size can be purchased, ensure the drain hole will avoid major chassis members. A couple of names to Google are 'Flair Showers' & 'DIY RV Solutions'
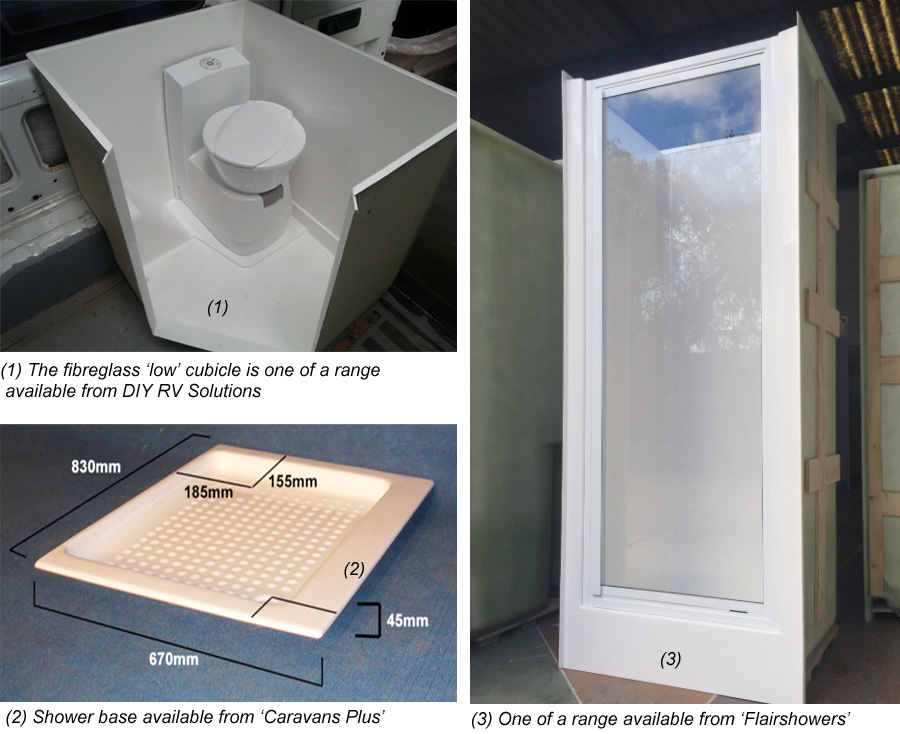
Many shower cubicles come without a door. These can be made to measure by a shower screen installer, and most often use perspex rather than safety glass. A positive catch is required while travelling.
You can make your own shower cubicle if you choose to, as I did, using a purchased shower base. Briefly, I covered all shower walls with laminate during the construction of the walls. The final wall which contained the door, had a translucent perspex on the shower side.
I then placed a VT90 shower base onto an edge of silicone. This particular base allows for two drain positions, and I have hooked up both, in case my caravan is not 100% level. (Usually my wife can pick a 1mm slope)

It is important to place the 'Bathroom Silicone' or 'Sikaflex' inside the join with sufficient thickness to provide a membrane. Any excess outside the join should be removed.
That completes the main building structures within a caravan. There are of course other methods and materials that can be used. This guide has shown, in my experience, the lightest and strongest methods that I have used with materials that are readily available to the home handyman. Many manufacturers have developed or sourced materials that allow for quicker construction.
Many use laminated MDF and this can provide a quicker and neat result. The two disadvantages to be considered are the extra weight and weaker joins. These two items are not as significant in a smaller camper-van fit-out which do frequently use MDF construction.