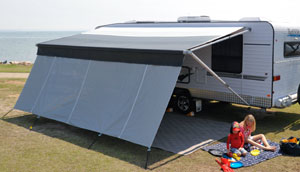
This guide walks through the basic installation sequence for a Fiamma F45 awning. Always read and understand the installation manual before starting, and use the correct bracket kit for your vehicle wall or roof shape.
1. Before installation
Check the vehicle wall and confirm the position of reinforced mounting points.
After confirming the reinforced points, choose the correct Fiamma brackets or adapter kit.
Have the installation carried out by qualified personnel where required by local regulations.
Do not drill until you have checked for wiring, gas pipes, plumbing and other hidden obstacles.
Seal all fastener holes properly to prevent water entry.
Mounting brackets
Awnings can be fixed to the wall of the vehicle using the brackets provided, or with specialty adapters for specific vehicles and mounting styles. If adapters are used, follow the instructions supplied with that bracket kit.
Fiamma F45 mounting bracket range
2. Mounting bracket locations
Three brackets should normally support the awning. The brackets at each end must be positioned where the awning arms are fixed to the case.
If using the standard brackets supplied with the awning, align the bracket locations with the Support markings on the rear of the awning case.
The awning must be mounted level both vertically and horizontally.
If the vehicle wall is not perfectly straight, use suitable spacers between the bracket and wall.
Remember the awning case may extend higher than the brackets, so check gutters, roof joins and other edges before choosing the height.
Fig. 1 - fixing location for mounting bracketsFig. 2 - brackets must be positioned level
3. Attaching mounting brackets
Before fixing the brackets, probe the wall and check the reinforced points. Confirm there are no internal obstacles such as electrical cables, gas pipes or plumbing behind the drilling points.
Mark the fixing point on the outer wall of the vehicle and drill.
Fix the brackets, making sure not to overtighten the bracket blocking nuts.
Use mastic or suitable sealant near the holes to prevent later water entry.
Position the awning on the brackets and secure it.
Use the most convenient fixing hole in the bracket, as shown in the Fiamma instructions.
F45 awnings include wall brackets for the leg supports. These are optional, but if fitted they should only be attached to reinforced points.
4. Awning operation
Fig. 6 - partially open awning and release legs
To avoid unnecessary strain on the awning and vehicle wall, release the legs when the awning is open about 1 metre.
Grasp each leg near the hinge joint, pull it toward you, unhook it and lower it.
After unrolling the awning completely, adjust the legs to the chosen height.
Secure the legs to the ground with the supplied hooks to reduce the risk of lift from unexpected gusts.
For safety, use a suitable tie-down kit when conditions require it.
Fig. 7 - peg down and tighten fabric
5. Closing the awning
The awning is a sun protection product. Close it in rain, wind or snow. If light rain is expected, lower one side so water can run off and use a suitable tension rafter where appropriate.
Fig. 8 - lower one side to assist water flow when raining
The leg foot must be placed correctly inside the lead bar housing when closing. If the foot is placed incorrectly, the lead bar may not close completely.
Fig. 9 - correct positioning of leg and foot
If the awning is still open, the red flag is visible. When the awning is completely closed, the red flag is no longer visible.