
Nothing in cart





Very happy with sevice and promptness and the fact as we were travelling in the region we could pick our order up at the premises. Thank you
2nd order by Neil & Cleone from WA
This guide shows an Aircommand Ibis 3 roof-top air-conditioner installation using an existing 360 x 360mm roof opening that already had roof strengthening and power wiring in place. It is most useful when replacing an old roof hatch or old air conditioner in a prepared roof opening.
The Ibis 3 is now an older model, so use this page mainly as an installation reference. For a new replacement air conditioner, compare the current roof-top range, roof-opening size, roof thickness, weight, plenum size and electrical requirements before assuming a new unit will drop straight into the same opening.
Any 230-240V connection must be done by a licensed electrician to the current wiring rules for caravans and recreational vehicles.
The original install took about 2 to 3 hours with one person, but lifting the roof unit is a two-person job unless suitable lifting equipment is available. The Ibis 3 roof unit weighs about 46kg.
Before cutting, lifting or wiring, check the following:
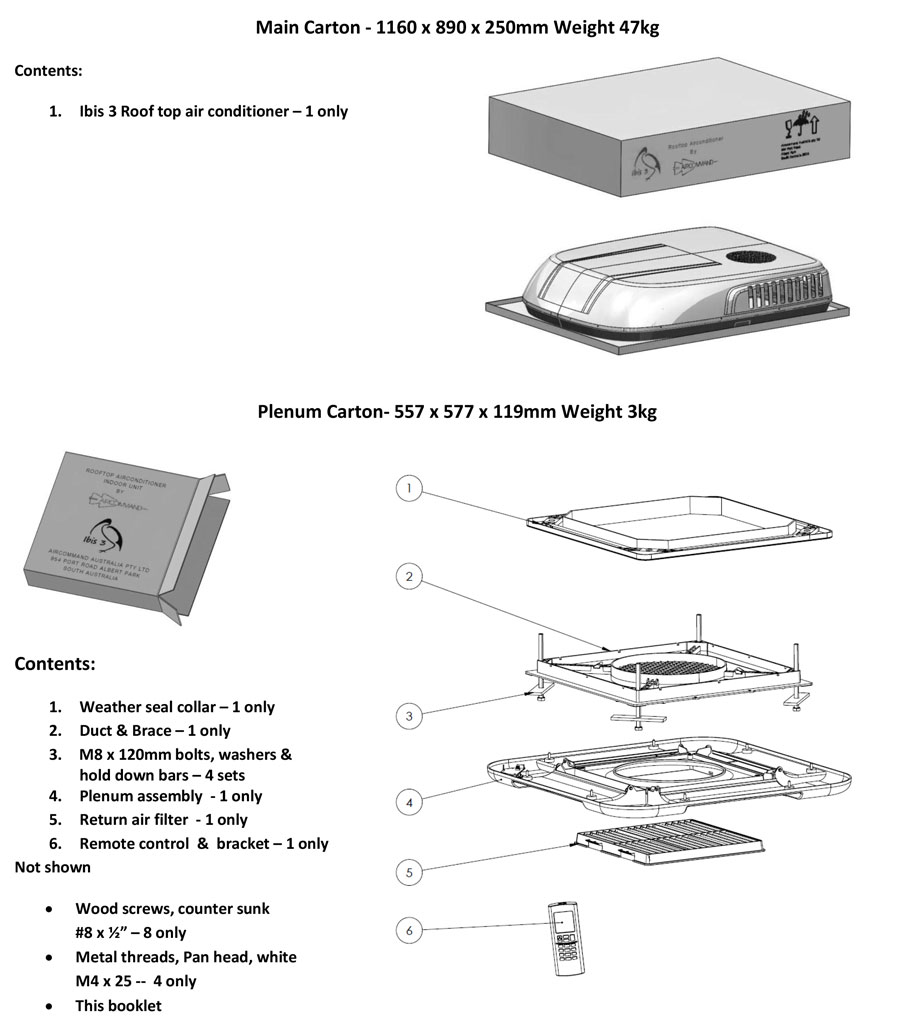

The Ibis 3 uses a 360 x 360mm square roof opening. If you are replacing a hatch, confirm that the hatch opening was prepared for an air conditioner and that the roof has suitable internal strengthening.
An H-frame is a support frame used to spread the air-conditioner load through the roof structure. The frame is not just a spacer. It needs to suit the roof opening, roof structure and air-conditioner kit. If roof strengthening is not already present, use the correct frame or have the roof assessed before fitting the unit.
The H-frame and roof build-up count as part of the roof thickness. If the total thickness exceeds the unit's normal range, a thick-roof adaptor or different install kit may be required.

If removing an old hatch, remove the screws, cut the old sealant carefully, lift out the hatch and clean the roof surface. Do not cut or pull at any roof wiring.


The black weather collar is sealed to the roof before the air conditioner is lowered into place. The collar has a marked top side and underside, so check the orientation before applying sealant.
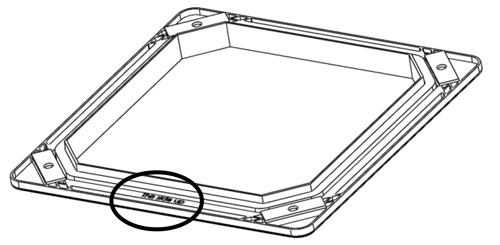

Apply the recommended sealant to the underside of the collar, press it into position, then seal around the bolt holes and collar edge as required. If the collar is loose in the opening, carefully fixing it in place can help centre the roof unit.

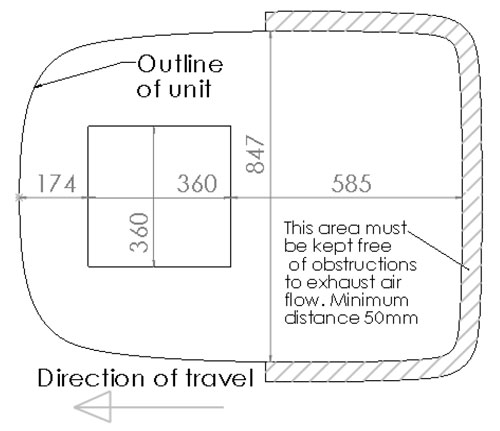
Lift the roof unit with two people or suitable lifting equipment, position it over the opening, and lower it so it engages with the weather collar.

The electrical supply connection must be done by a licensed electrician. The power supply must be isolated before work starts, and the finished installation must comply with the current caravan electrical rules.

From inside the caravan, raise the duct and brace, insert the M8 bolt assemblies, align the hold-down bars and tighten the bolts evenly. The original instructions specify 12 to 14Nm torque and warn not to exceed 14Nm.
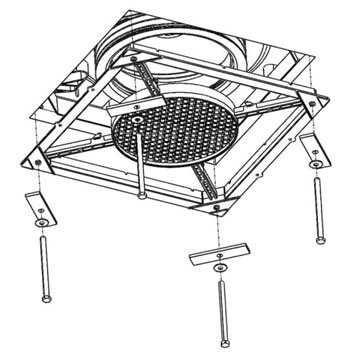
Pull the return-air duct down and engage it with the central duct. Then connect the plenum control cable and fit the plenum assembly to the brace arms.
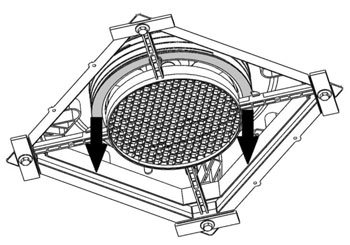

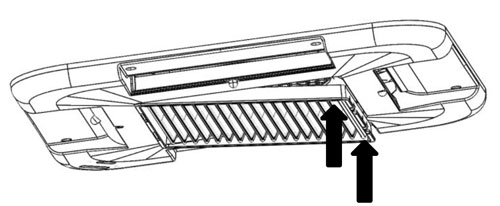
Fit the return-air filter, install any screw caps, clean up sealant and test the unit. If the plenum does not sit flat, check for ceiling unevenness and use the supplied additional fixing points only as directed.

If an air conditioner starts by itself after power is restored, check the model's auto-restart or memory behaviour in the manual. Some units resume the previous mode after a blackout. If that behaviour is not wanted while the van is stored, turn the unit off at its control, isolate the circuit where appropriate, or ask a qualified technician/electrician to check the setup.
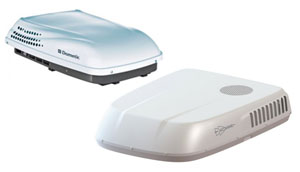
For current replacements, do not assume the newest roof-top air conditioner will match every Ibis 3 detail. Check roof opening, roof thickness, plenum footprint, wiring, H-frame/support and available service space before ordering.









Very happy with sevice and promptness and the fact as we were travelling in the region we could pick our order up at the premises. Thank you
Great service
Fantastic service by the lady who answered the phone she couldn't do enough for me. The parts arrived quite quickly.