Nothing in cart


Gtrat communication, and looked after me.
2nd order by Ashley from VIC

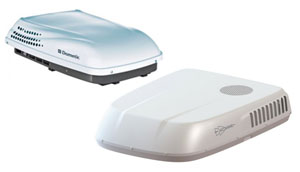
The Dometic FreshJet 7 range replaced several well-known caravan air conditioners, including the Harrier Lite, Ibis 4 and Harrier Plus. It has now been replaced by the FJZ range, but the FreshJet 7 details are still useful when checking an existing van, identifying an older unit, or understanding the replacement path.
If you are choosing a new unit, the right model depends on the van size, roof space, roof strength, existing opening, 240V supply and how you use the van. Do not choose only by the biggest cooling number. A unit that suits the roof and the electrical system will usually be easier to live with.
If you are comparing the newer Dometic FJZ range, see our Dometic FreshJet FJZ buyer guide. For broader size and brand selection, start with selecting the correct caravan air conditioner.
As a simple starting point, the old FreshJet 7 models and their current replacement path sit like this:
| Older FreshJet 7 model | Replaces | Status | Current FJZ path |
|---|---|---|---|
| FreshJet 7 Lite | Harrier Lite | No longer available as a current sale model. | FreshJet FJZ7 Lite for small vans and compact rooftop installs. |
| FreshJet 7 Pro | Ibis 4 | No longer available as a current sale model. | FreshJet FJZ7 Pro for the main mid-sized van option. |
| FreshJet 7 Plus | Harrier Plus | No longer available as a current sale model. | FreshJet FJZ7 Plus for higher-output rooftop cooling. |
The size of the van is only one part of the decision. Insulation, window area, annex walls, shade, roof colour, available 240V supply and where you travel all affect how hard the air conditioner has to work.
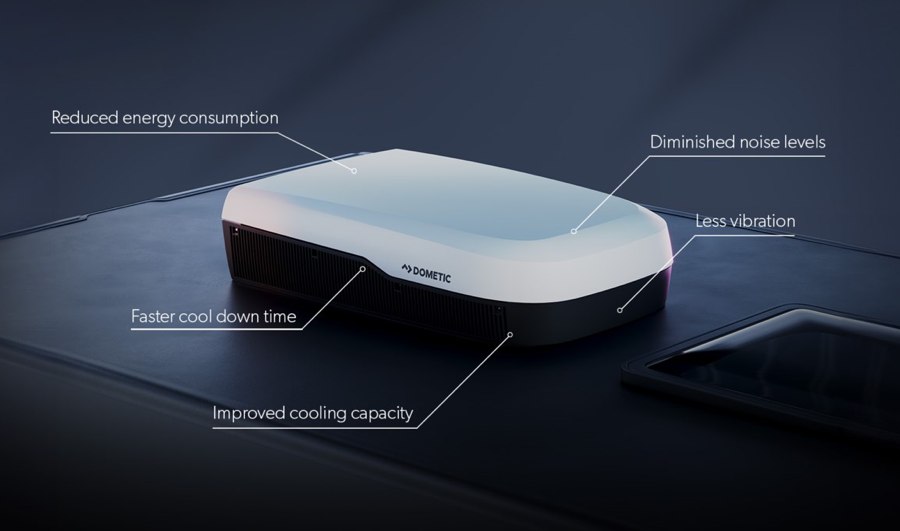
The FreshJet 7 range kept the familiar rooftop air conditioner layout, but updated the design, controls and airflow. The main customer-facing changes were:
That does not mean every older air conditioner should be changed immediately. If your existing unit works well, the main reasons to replace it are usually failure, parts availability, noise, power use, roof work, or wanting a different size unit for how you now travel.
| Older model | Old rating | Current replacement | What changes with FJZ |
|---|---|---|---|
| FreshJet 7 Lite | 2.5kW cooling / 2.2kW heating | FreshJet FJZ7 Lite | More cooling at 3.0kW, updated controls and current FJZ feature set. |
| FreshJet 7 Pro | 2.9kW cooling / 2.6kW heating | FreshJet FJZ7 Pro | More cooling at 3.4kW, more heating, and the current mid-range model. |
| FreshJet 7 Plus | 3.4kW cooling / 2.9kW heating | FreshJet FJZ7 Plus | More cooling at 4.0kW, more heating, and the current high-output model. |
The Dometic FreshJet 7 Lite was the compact model in the FreshJet 7 range. It replaced the Harrier Lite and suited smaller vans where roof weight and space were important.
For a current new unit in this position, use the Dometic FreshJet FJZ7 Lite. Before ordering, check the roof opening, roof thickness, available clearances and whether the unit will sit clear of solar panels, aerials and vents.
The Dometic FreshJet 7 Pro replaced the Ibis 4 position in the FreshJet 7 range. It was the middle option for medium to larger caravans where the owner wanted a balance of output, weight and roof profile.
For a current new unit in this position, use the Dometic FreshJet FJZ7 Pro. If you are replacing an Ibis-style roof unit, do not assume the job is only a direct swap. Confirm the existing cut-out, ceiling assembly, roof thickness, roof-frame condition and 240V wiring before committing to the install.
The Dometic FreshJet 7 Plus replaced the Harrier Plus position and was the highest-output model in the FreshJet 7 range.
For a current new unit in this position, use the Dometic FreshJet FJZ7 Plus. Higher output is useful, but it is not always the right answer. Check the available roof space, unit weight, power supply, generator or inverter capacity if relevant, and the air conditioner's clearance requirements. A large rooftop unit installed in the wrong place can create more trouble than it solves.

The FreshJet 7 feature list is useful, but some features matter more than others when you are choosing a caravan air conditioner.
The inverter compressor can adjust output rather than simply cycling hard on and off. In practice, this can help with smoother temperature control and quieter running once the van is close to the set temperature. It does not remove the need for a suitable 240V supply.
The air distribution box is the inside ceiling section. Check the controls, light, filter access and ceiling clearance. If you are replacing an older unit, the ceiling assembly is often just as important as the rooftop section.
WiFi/Bluetooth app control is handy, but it should not be the main reason to choose a model. Treat it as a convenience feature after the air conditioner size, fitment and electrical requirements are right.
The heating function is useful for cool mornings and shoulder seasons. It is not the same decision as choosing a dedicated diesel or gas heater for cold-weather camping, but it can reduce how often you need separate heating in mild conditions.
Before you order a replacement rooftop air conditioner, confirm these points:
The FreshJet 7 Lite needs 50mm clearance for nearby objects under 60mm high, and 150mm for taller objects on all sides. The Pro and Plus need 50mm for nearby objects under 60mm high and 150mm for taller objects on most sides, with 300mm required on the right-hand side. Left and right are viewed when looking at the unit from the front of the vehicle.
A FreshJet 7 can be installed into a new roof opening or into a suitable existing opening. If you are not experienced with caravan roof work, use a caravan repairer or installer. Cutting a roof, reinforcing an opening and sealing the frame are jobs where mistakes can lead to leaks or structural problems.
Select the roof position between suitable supports, then mark the 400 x 400mm opening. Check for wiring before drilling or cutting. Drill the corners, cut the opening carefully, and assess whether the roof needs reinforcement before the roof frame is fitted.
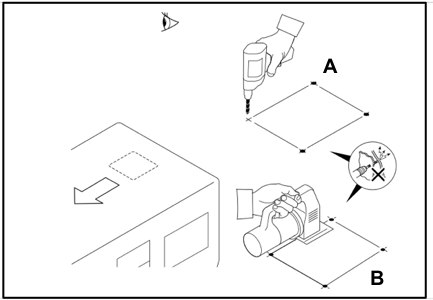
If reinforcement is needed, remove enough foam for the reinforcing rails and fit the rails securely before the frame is sealed and installed.
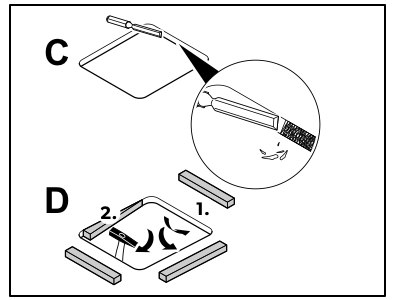
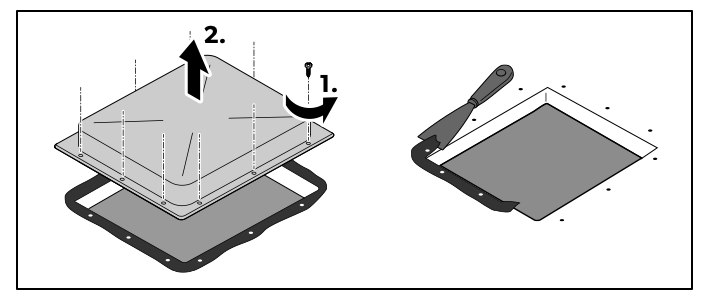
Remove the old hatch or air conditioner, then carefully remove old sealant from around the opening. This is the time to check for water damage, uneven roof surfaces and previous repairs before the new frame goes down.
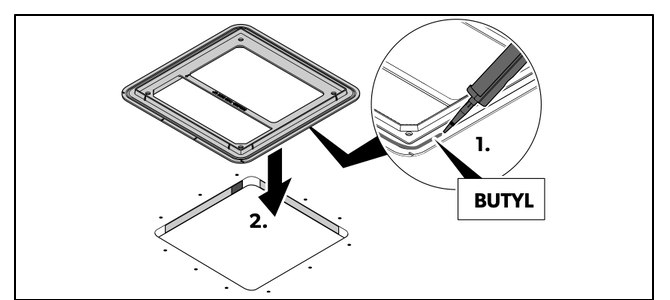
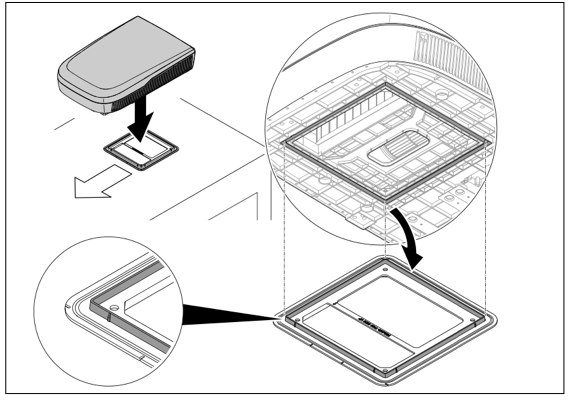
Seal the underside of the roof frame with a flexible, non-hardening butyl sealing compound, following the product instructions. Orient the roof frame correctly, place it into the opening, then lift the rooftop unit into position in the direction of travel.
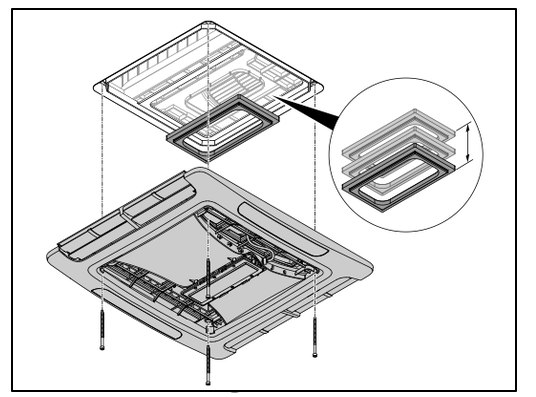
The number of duct sections depends on the roof thickness. As a guide, roofs from 25 to 35mm use one section, 35 to 45mm use two, 45 to 55mm use three, and 55 to 60mm use four. Extra duct sections may be needed for thicker roofs.
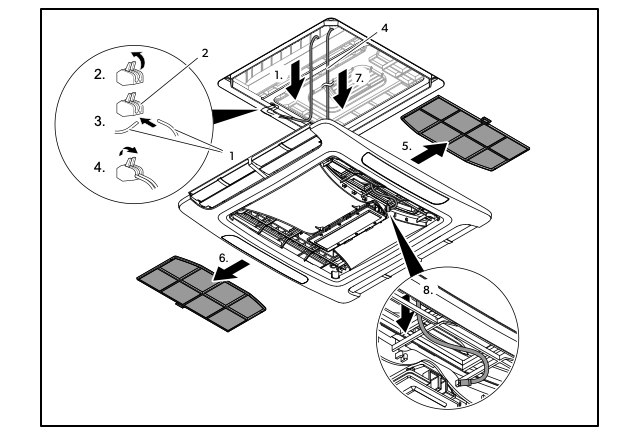
Attach the required duct sections to the air distribution box, fasten it to the ceiling through the rooftop unit with the supplied bolts, refit the filter and clip the centre cover into place.
All 240V electrical work must be performed by a qualified electrician. Before connection, the installer needs to check the data plate, supply voltage, required current, circuit protection, RCD protection and cable sizing.
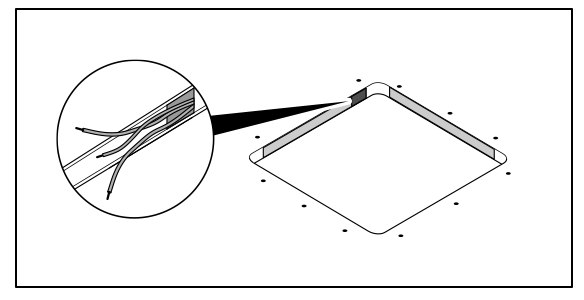
The power cable is fed through the side opening into the vehicle interior. The electrician connects the supply cable, grounding cable and communication cable, then the system can be tested after the installation is complete.
For the full installation sequence, clearances, wiring details and technical data, refer to Dometic's FreshJet Series 7 Installation Manual.